Using the Expense Claim Request App
Processes: There are two processes in this app:
1) Expense Claim Request Process
2) Add Currency
Roles:
Expense Claim Request process have three roles:
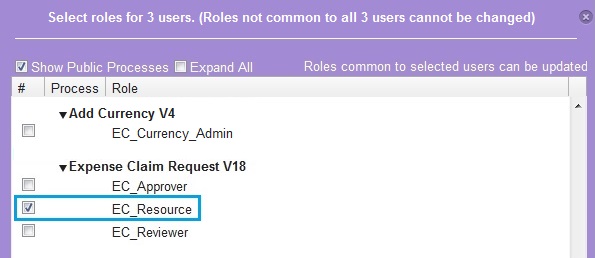
1. EC_Resource (This role can initiate EC request)
2. EC_Reviewer (This Role will review and either send the request back to Resource in case to make changes or send it forward to Approver)
3. EC_Approver (This Role can either reject or accept the request forwarded by the Reviewer. If request is to be rejected then Approver will send the process to ‘finish’ without marking the ‘Approve’ checkbox. If request is to be accepted then Approver will send the process to finish after marking the ‘Approve’ checkbox)
Add Currency process have one role:
1. EC_Currency_Admin (This role can add or modify currencies which are visible to users in Expense Claim Request Process)
STEP 1: Assign Roles for Expense Claim Request and Add Currency Processes
1. Select users for the EC_Resource role:
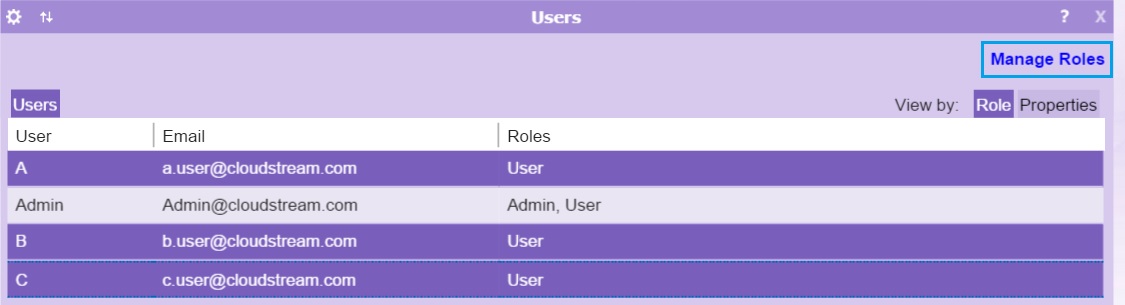
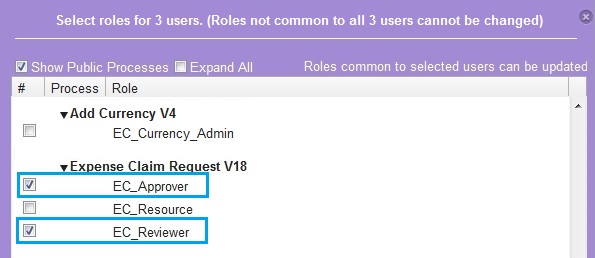
2. Assign the EC_Resource role:
3. Similarly, select the users who should be reviewer and approver and give them their respective roles:
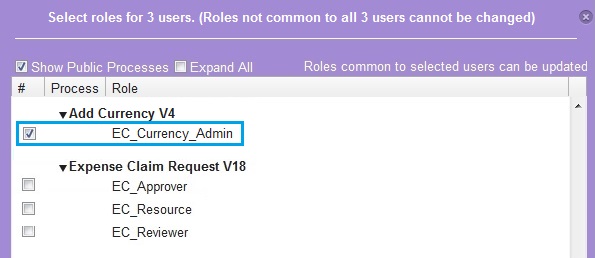
4. Follow the same instructions starting from step 1 and assign ‘EC_Currency_Admin’ role to selected users.
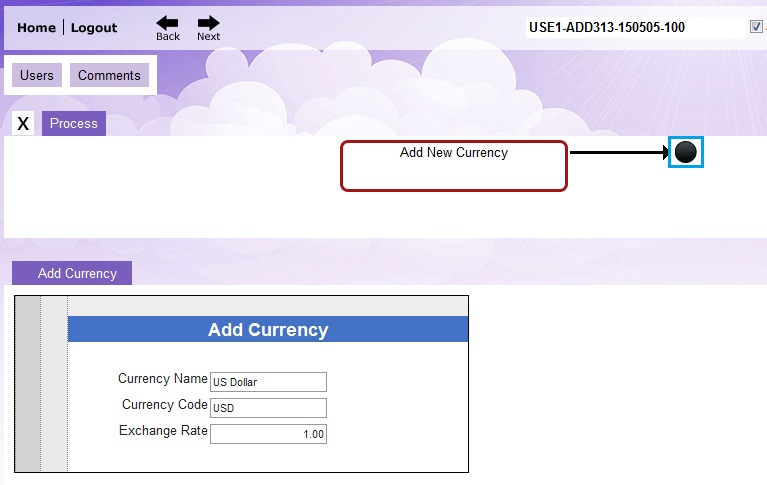
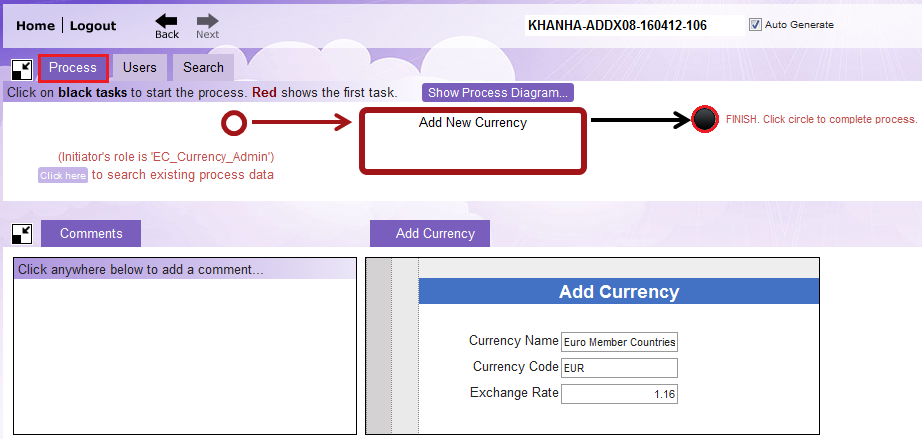
STEP 2: Add or Modify currencies using the ‘Add Currency Request’ process
This process is used to add or modify currencies which are visible to users using Expense Claim Request Process.
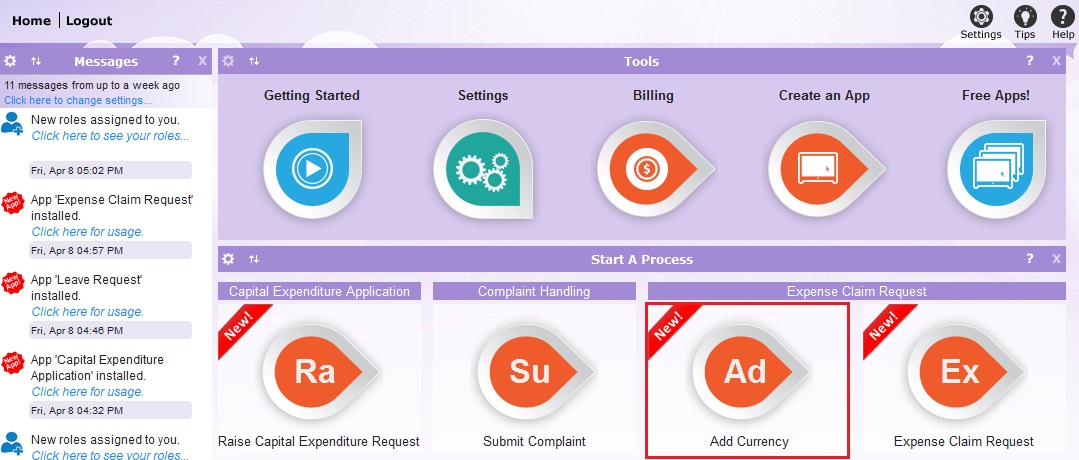
1. A user who is ‘EC_Currency_Admin’ can now log in and raise a Add currency request:
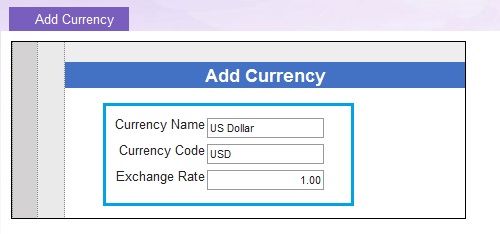
2. Fill in the given fields with appropriate values.
3. After filling the fields click on ‘finish’ button to save the changes. Repeat the process to add more currencies.
4. User can also modify existing currencies by logging in Add currency request and view the ‘Search’ tab.
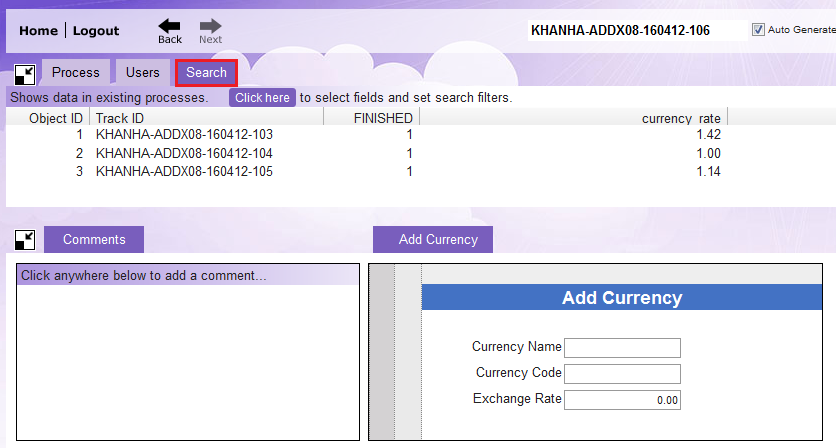
5. Select the process to change.
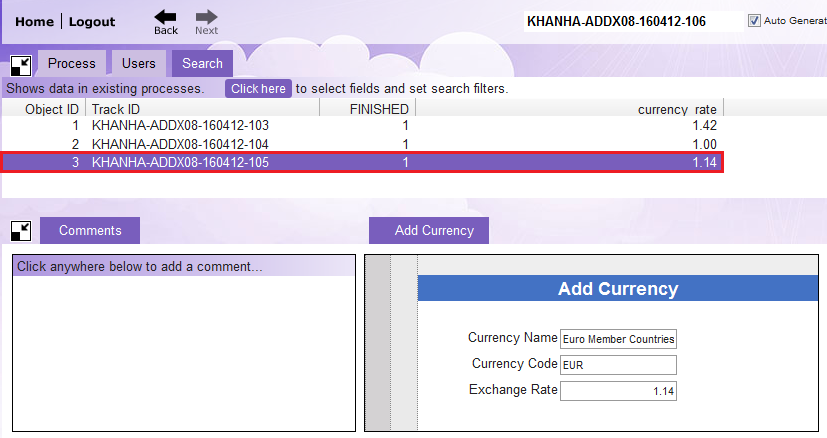
6. Change field(s) value.
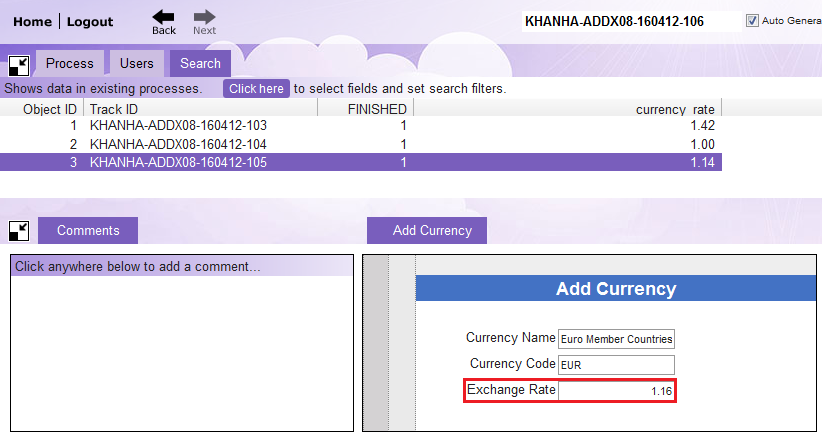
7. After making changes click ‘Finish’ button from ‘Process’ tab to save the changes.
8. Click ‘Modify Existing’.

STEP 3: Raise Expense Claim Request
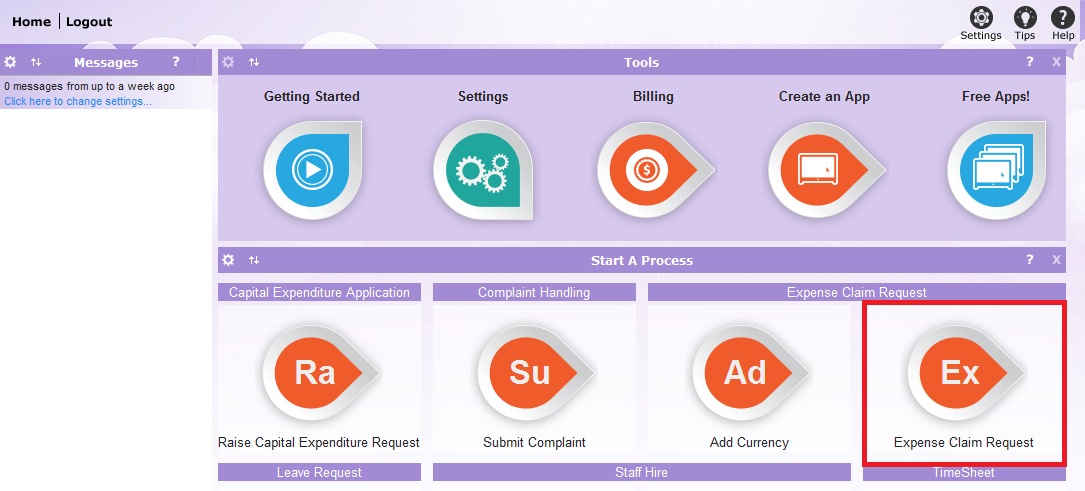
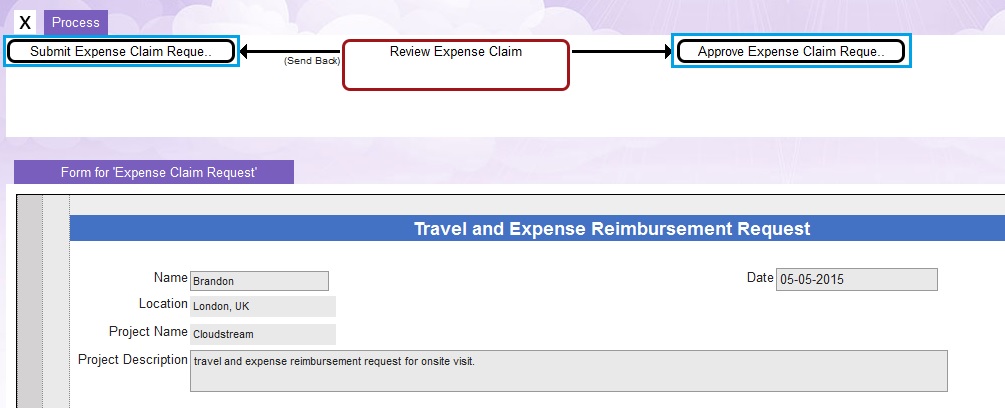
1. A user who is ‘EC_Resource’ can log in and raise a expense claim request by clicking the ‘Expense Claim Request’ tile.
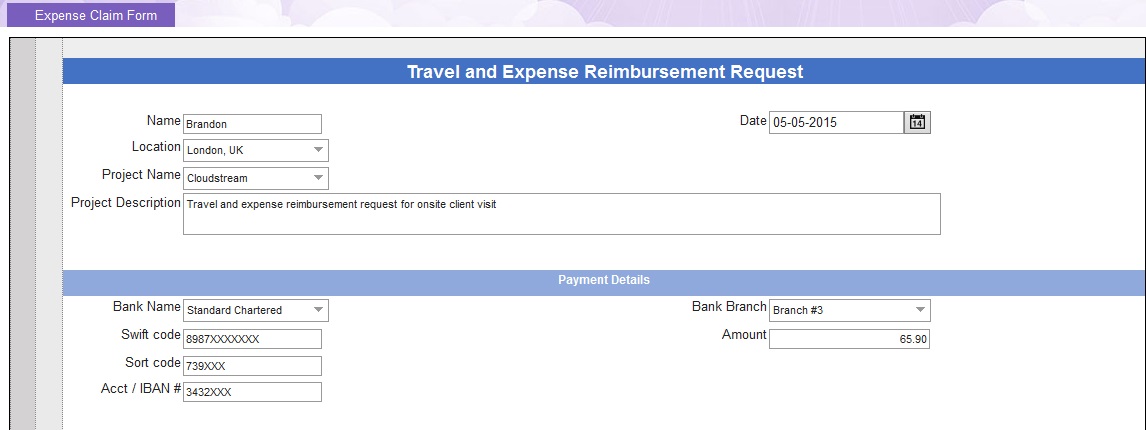
2. Start by filling out the form.
3. User can add multiple ‘Expense details’ with their request by clicking the ![]() button and selecting ‘Add New EC_Expense_Details’ from the pop out menu.
button and selecting ‘Add New EC_Expense_Details’ from the pop out menu.

4. Fill in the fields and upload receipt by clicking the ‘Upload’ button and selecting the file from your local machine.

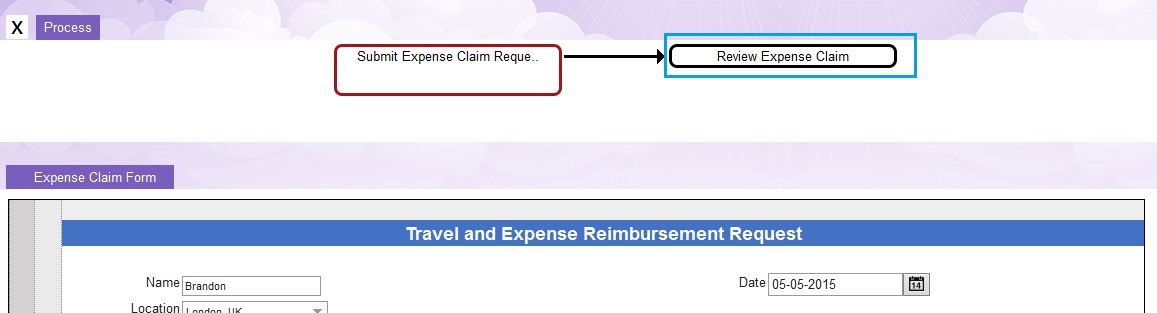
5. Once the expense form is complete, send the process forward to ‘EC_Reviewer’ by clicking the ‘Review Expense Claim’ button.
NOTES:
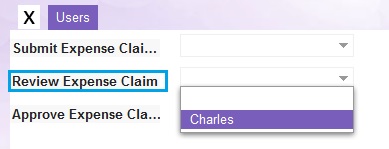
• Pressing the Review expense task will send the request to all Reviewers. However, the expense requester can select a particular Reviewer from the ‘Users’ tab:
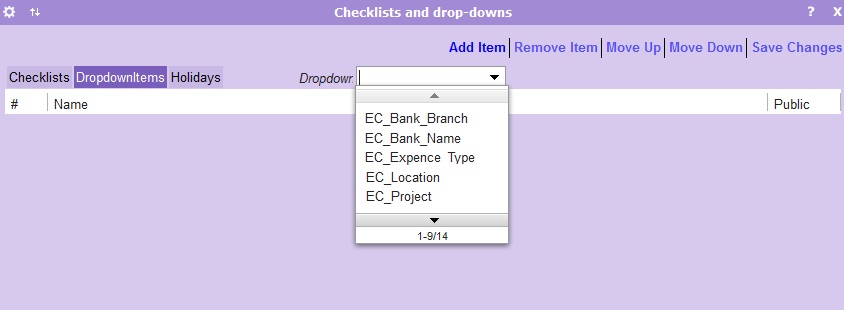
•The admin can define further types of Bank Branch, Bank Name, Expense Type, Expense Location and Expense Project from checklist and dropdown items tab:
STEP 4: Request Review by ‘EC_Reviewer’
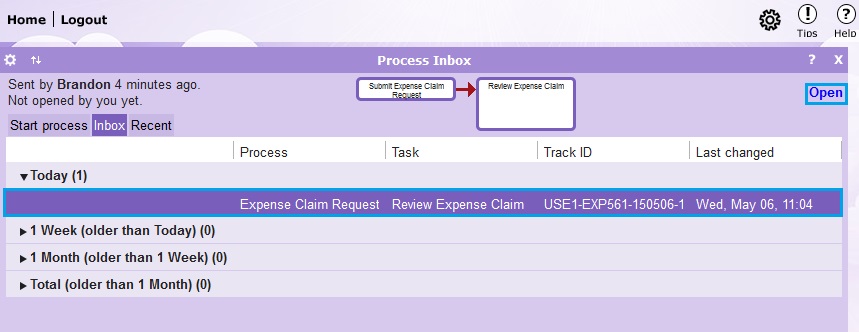
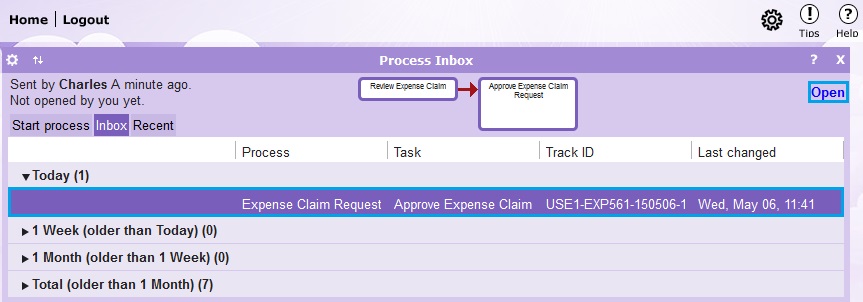
1. A user who has the ‘EC_Reviewer’ role can log in and review the expense request before forwarding it to approver. To open the process go to ‘Process inbox’ tile. Select the process and click the ‘Open’ button.
2. Reviewer will review the expense claim and forward the process to Approver. Reviewer can send the process back to EC_Resource in case of any discrepancy in the submitted request.
NOTES:
• If there is a problem use the Comments area to communicate it with the request initiator:
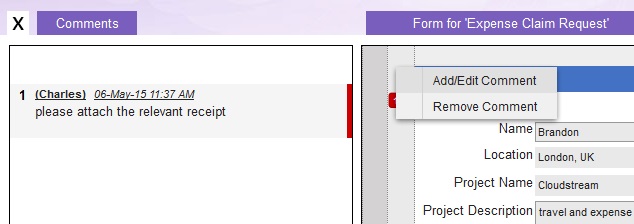
After adding the comments send the process back.
STEP 5: Request Approval by ‘EC_Approver’
1. A user who has the ‘EC_Approver’ role can log in and approve the request. To open the process go to ‘Process inbox’ tile. Select the process and click the ‘Open’ button.
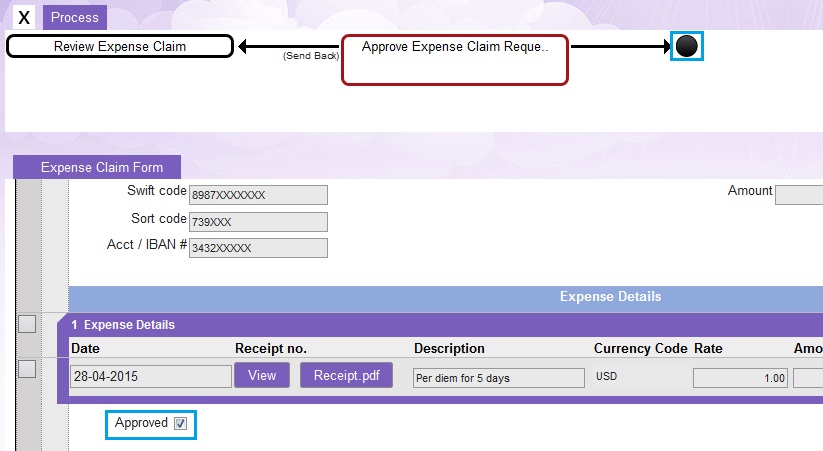
2. Approver will review the expense claim form. If there is no objection then approver will checkmark the ‘Approved’ button and finish the process by clicking the ‘finish’ button. If the ‘Approved checkmark’ is left uncheck then in reports this process will be shown as unapproved. Approver can also send the process back to ‘Reviewer’ in case of any discrepancy.
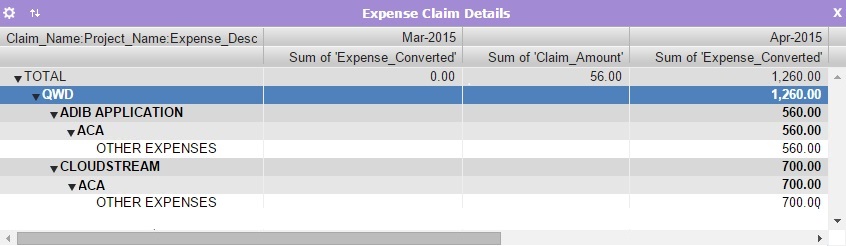
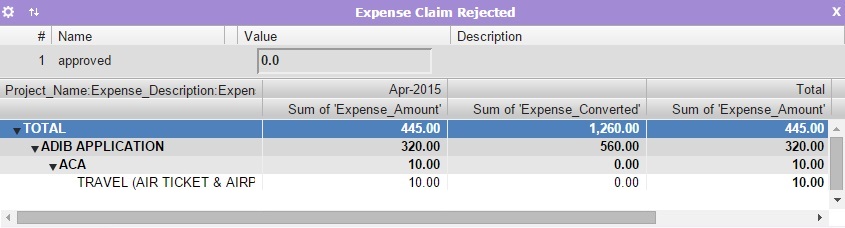
STEP 4: Monitor Reports
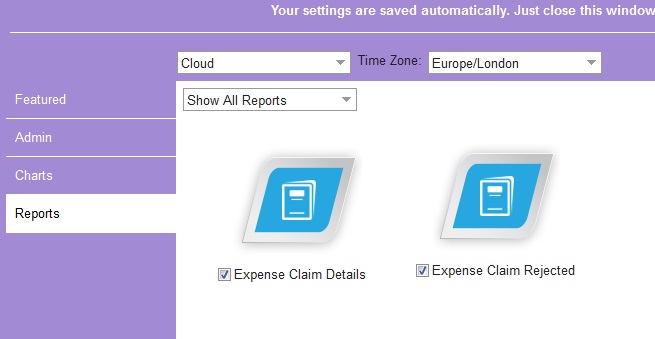
1. There are two reports related to Expense Claim Request Process.
I.Expense Claim Details
II.Expense Claims Rejected
To show these report on Home Screen select them both from the Settings window (Reports tab).
2. The report appears and shows list of Expense Claims and Expense Claim Rejected details: