

Interacting with your process
This page assumes that you already have the two roles ‘Requester’ and ‘Approver’ in the sample process. (To see how to create a process see ‘Creating a process in 12 steps‘ . To see how to assign yourself the roles to interact with the process, see ‘Adding roles to your account‘)
To interact with a newly created version, you must add your process to your home page.

Click on ‘Settings’ (1) to add your process tile on your home page
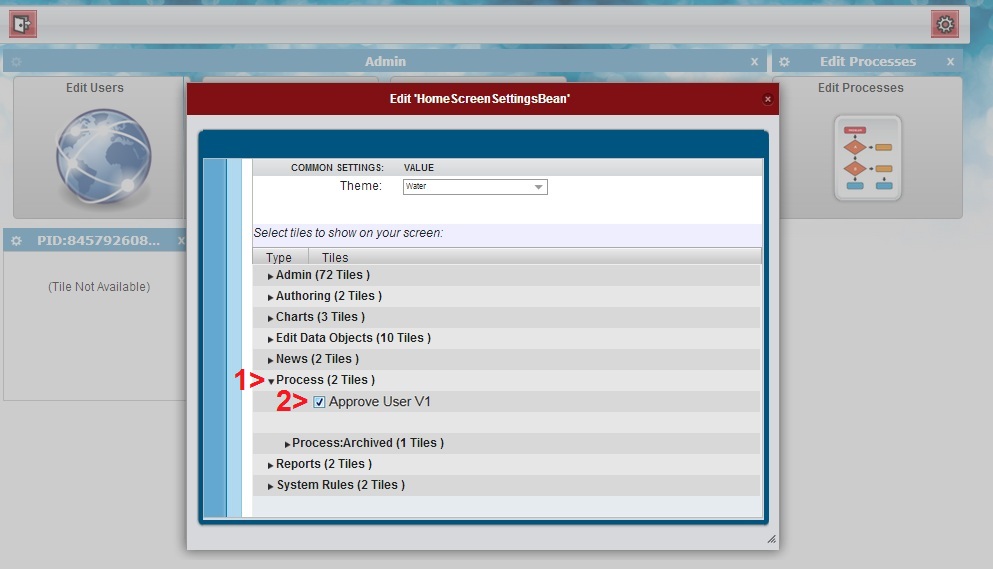
Expand the ‘Process’ option (1) and select your process from the list (2). Your process will now be added to your home page.
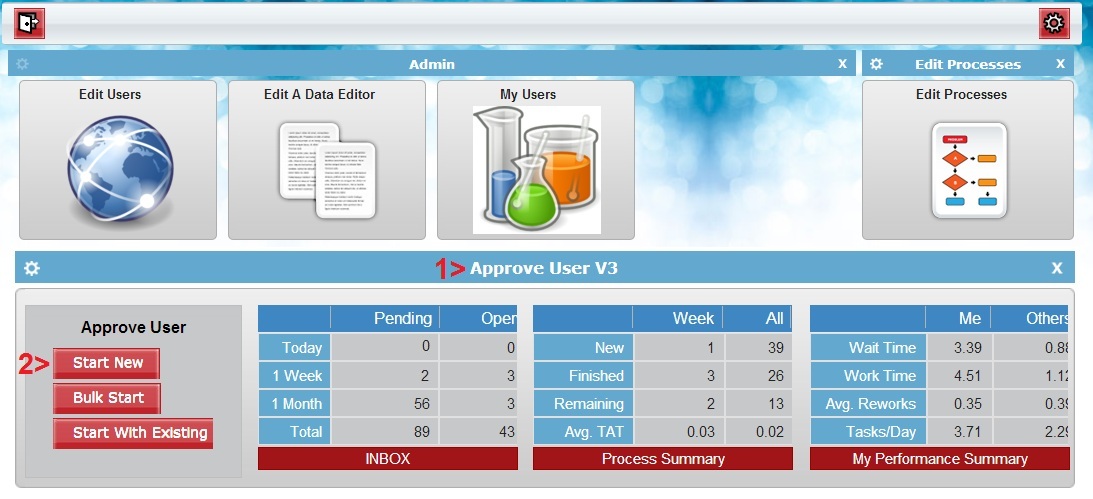
You can now see your process tile on your homepage. From the ‘Approve User’ process tile (1) you can start a new process by clicking on ‘Start New’ (2).
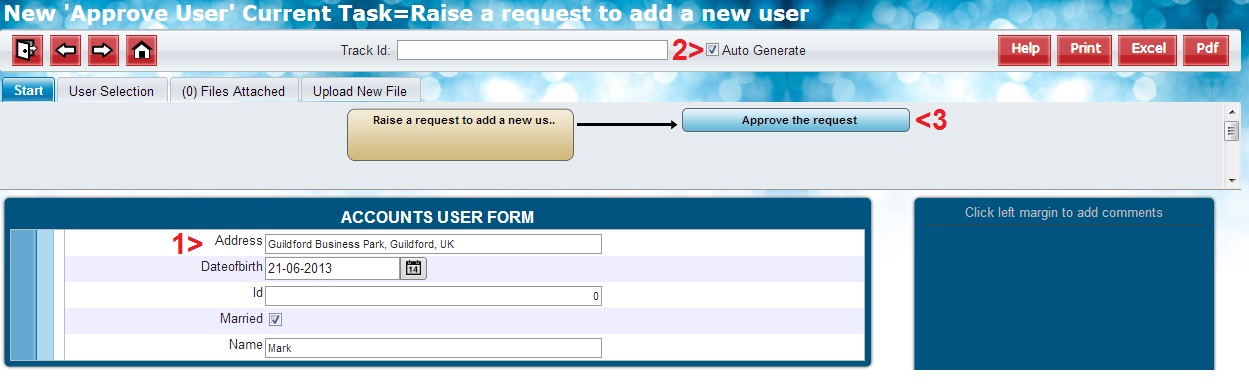
The form designed earlier will open. Fill in the fields (1). Select the check box (2) – this will auto generate a unique ID for the process. Click on the next step of the process (3) to start your process.

The process will start and you will be returned to your home page. The ‘INBOX’ will now indicate a new process has started (assuming you have the role ‘Approver’). Clicking on the table (1) will take you directly to your Inbox.

In the ‘Inbox’ page, click on the process row (1), and select ‘Next’ (2)

The process form will open. Here you can either ‘Finish’ the Process (1) or Send it back to the Requester (to remove any discrepancy) (2).
You can also provide comments at any stage. To add a comment right-click on the light-blue margin and select ‘Add / Edit Comment’ (3).
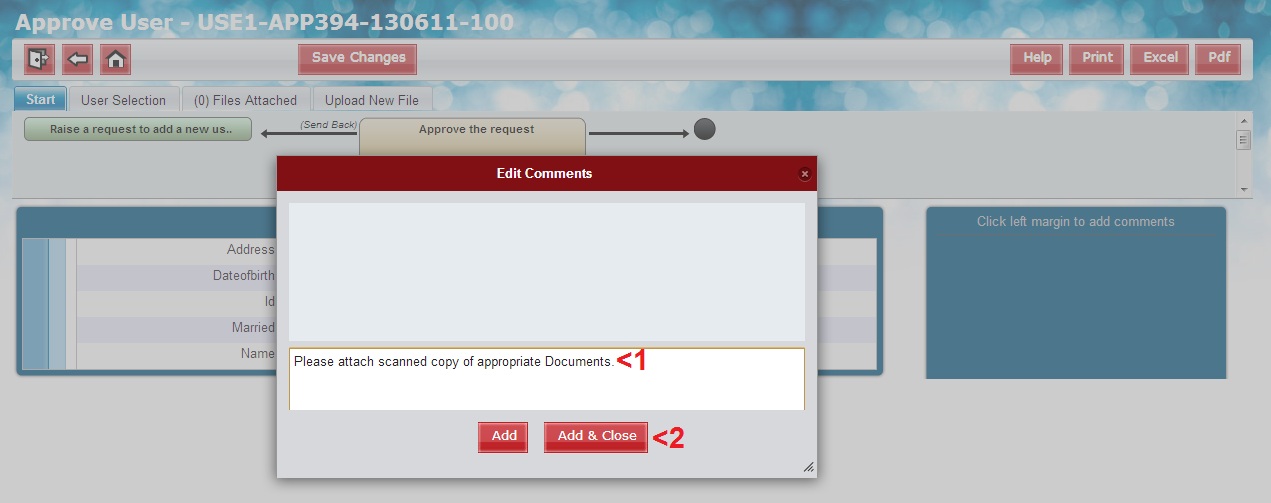
In the ‘Edit Comment’ window enter your comments (1) and then click ‘Add & Close’.
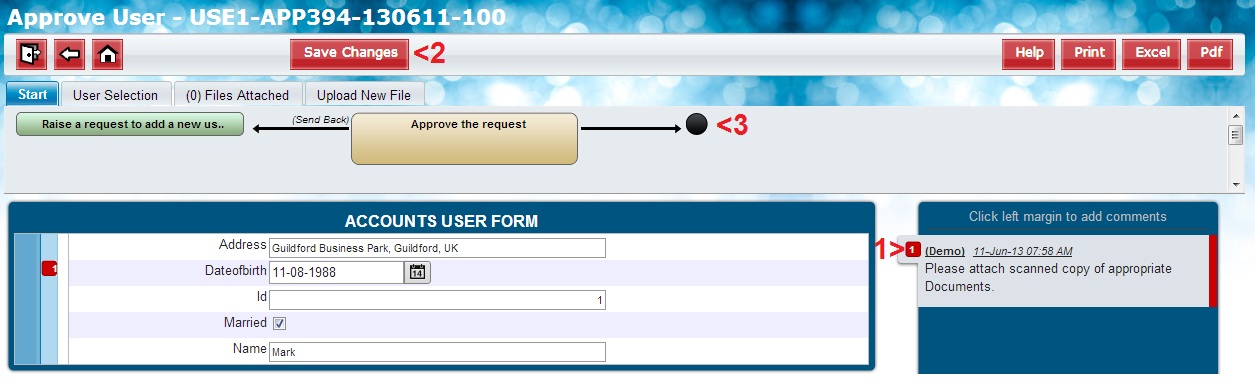
You can view your comments in the Comment box (1). Comments will be visible to all roles who can also add their own comments as a reply. Any changes made on the form can be saved by clicking ‘Save Changes’ (2).
To forward the process, click on the next task – in this case ‘Finish’ (3).


