

Creating a process in 12 steps
Creating your Process Flow in CLOUDstream is simple and easy. Process flows can easily be implemented in CLOUDstream using these 12-steps that guide the user through process flow creation.
Twelve steps to your process flow:
- Add Tiles to your “Home Screen”
- Name your “Process”
- Define ‘Department’, ‘Roles’ and ‘Task’ in Workflow
- Create ‘Data Objects’
- Select ‘Data Objects’ to Edit
- Edit ‘Data Objects’
- Add/Edit fields to the ‘Data Objects’
- Publish ‘Data Objects’
- Create User ‘Form’
- Add ‘Data Object’ with ‘Form’ to create fields
- Make ‘Form’ Public
- Select ‘Form’ and ‘Data Object’ for Process and make ‘Public’
STEP 1. – Add Tiles to your Home Screen
CLOUDstream allows users to customize their desktop as they wish. They can ‘Add’, ‘Remove’ or ‘Adjust’ tiles on their Home Screen. If the user is logging in for the first time, then no tile will be visible and the Home Screen will be blank.

Login using your username and password

Click on the Settings button (1) to Add New tiles on your ‘Home Screen’

Extend option ‘Authoring’ and place a check on (1) ‘Edit Process’. Also extend option ‘Edit Data Objects’ and place a check on (2) ‘Add Or Edit Data Editors’. This will add the two tiles ‘Edit Process’ and ‘Add or Edit Data Editors’ to your Home Screen. Now close this window (3)
STEP 2. – Add your New Process

Click on the ‘Edit Processes’ tile (1) to open the ‘Edit Processes screen’

Press the ‘Add New’ button (1) to add a New Process

Give a name to your first process (1), then press Add button (2)
STEP 3. Define ‘Department’, ‘Roles’ and ‘Tasks’

The new process you created will appear as a shaded rectangle. Select it by clicking on it (1), and press the ‘Edit’ button (2) to open the process designer

A simple two task process will have been created automatically with a standard department, roles and task names to act as placeholders.
In the process designer (Above), we will flesh out the process and give the department (1), roles (2) & (3) and tasks (4) a meaningful name.
- Double click on the pool (1) and enter a department name, press outside the edit area to close.
- Double click on each of the roles (2) and (3) and give them meaningful names. We have an ‘Requester” and an ‘Approver’
- Double click on the tasks (4) and enter a description of each task. Click outside the edit area to close the edit area.
Once satisfied with the process, press the Save button (5) to save the changes you made to the process. Use the ‘Back’ button (6) to go back to Application View page.
STEP 4. (Create ‘Data Objects’)
Now we need to think about the information our process will move around. We want to capture the ‘New User’s details, which shall include, Name, Address, Marital Status and Date of Birth.

Click on the ‘DATA’ tab (1) and add a new Data Collection by pressing the ‘Add’ button (2)

Enter a name for ‘New Object’ (1) and press ‘OK’ button (2)
STEP 5. (Select ‘Data Objects’ to Edit)

Edit the newly created Data Collection by selecting it (1) and pressing the ‘Edit’ button (2)
STEP 6. (Edit ‘Data Objects’)

In the Data Designer, drag and drop a Data Object onto the Canvas area (1), then select it by clicking on it (2) and press the Edit button (3)

You can rename the Entity (1) and close the window (2)
STEP 7. (Add/Edit fields to the ‘Data Objects’)
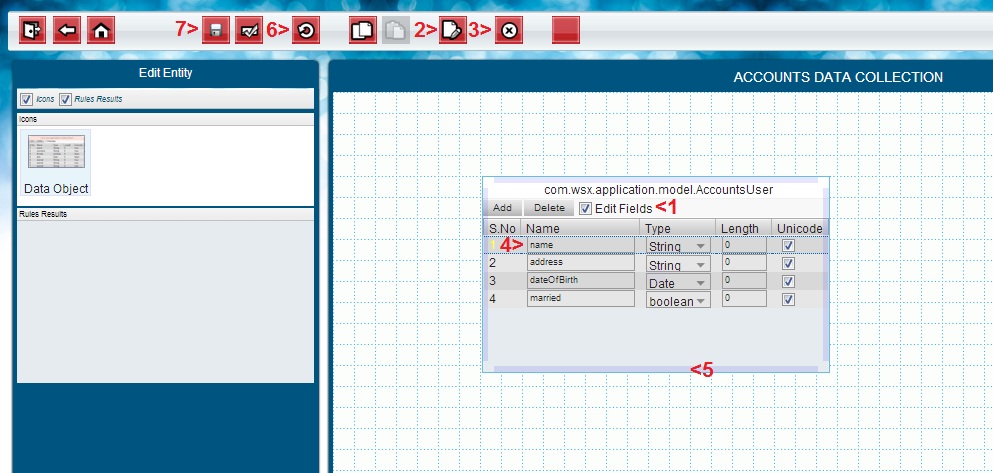
Add the fields we discussed above, by selecting the ‘Edit Fields’ check box (1) on the ‘AccountsUser’ object, and using the ‘Add’ (2) and ‘Delete’ (3) buttons as appropriate, to add the fields to the data object. Click on each field name (4) to edit them (no spaces please) . If you run out of space, use the drag-handle (5) to pull the rectangle’s bottom edge further down. If you make any mistakes, use the ‘Undo’ button (6). The finished object should look as above.
Press the Save button (7) to save the Data Collection Changes.
STEP 8. (Publish ‘Data Objects’)
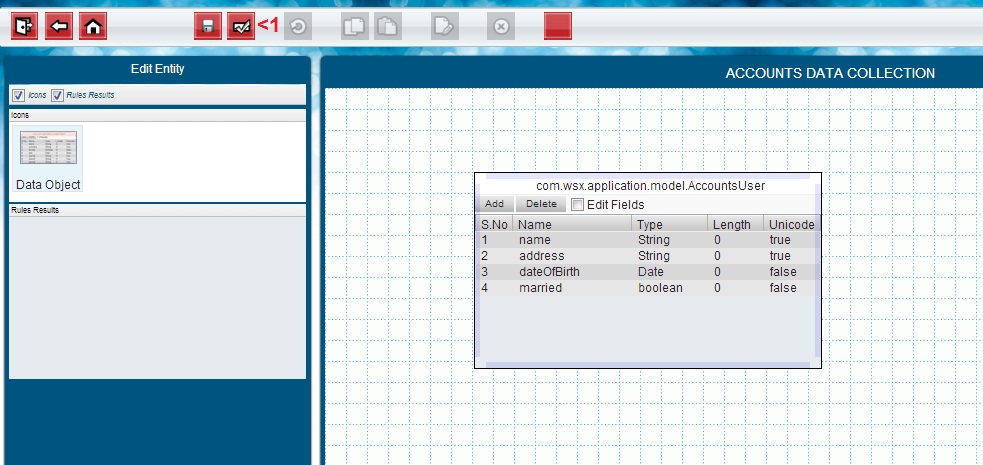
Now ‘publish’ the newly created data object, selecting the ‘Manage Versions’ button (1)

Select the topmost item (1) which is your object’s latest saved version, and make it public by pressing the ‘Public’ button (2). There will be a short delay, then a popup message will confirm that the data object has been made public.
STEP 9. (Create User ‘Form’)

Now we shall create a Form to interact with users of the process. This form will be ‘backed’ by our newly created Data Object.
Navigate to the Application View, and select the ‘Forms’ tab (1) and then select ‘Add New’ (2)
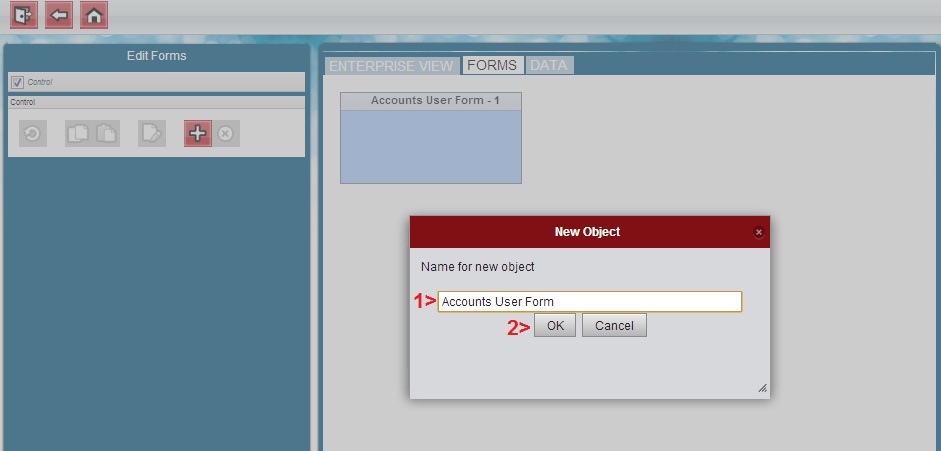
Enter an appropriate name for the form (1) and Press the ‘Ok’ button (2)
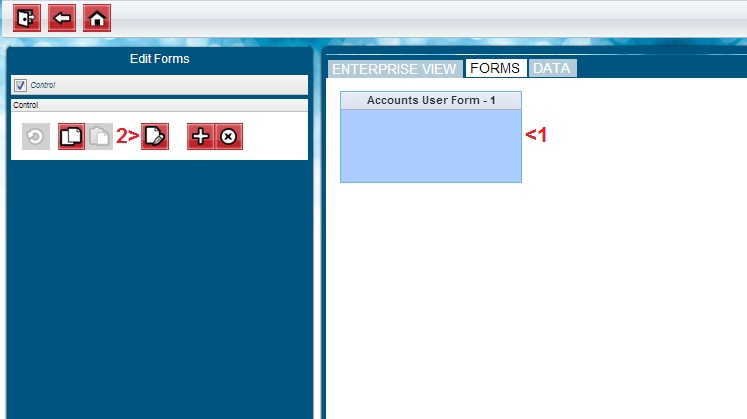
Select the Newly created ‘Form’ (1) and select the ‘Edit’ button (2) to open the Form Designer
STEP 10. (Add ‘Data Object’ with ‘Form’ to create fields)

In the form designer, select the appropriate process earmarked for this form (1), and the Data Object just designed (2). Press the ‘Add Table’ button (3). The designer will automatically create the appropriate form fields for you.
STEP 11. (Make ‘Form’ Public)

Now to make the form ‘public’ first save it (1) and then click the ‘Manage Versions’ (2)
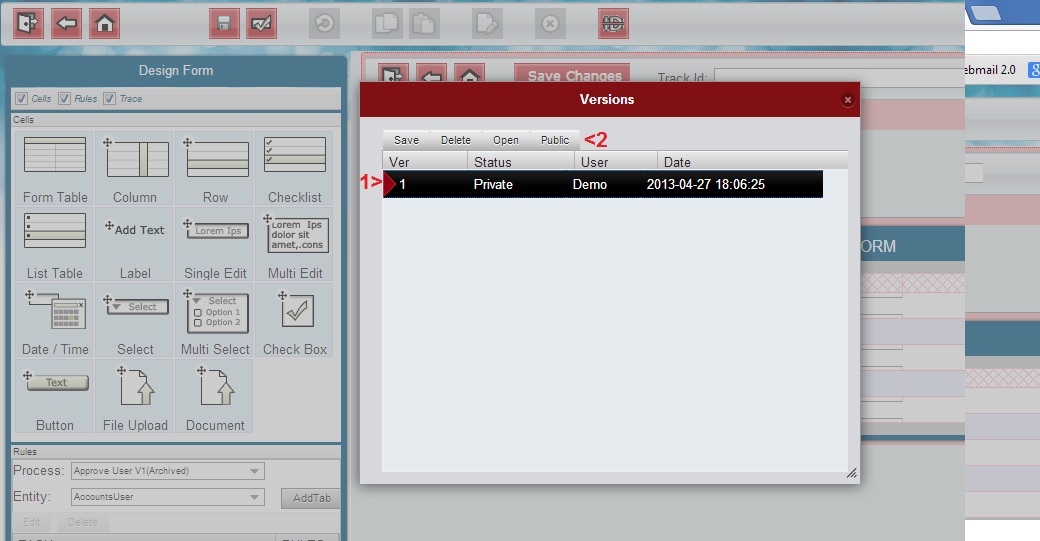
Select the Top most version (1) and press the ‘Public’ button (2) to make it Public
STEP 12. (Select ‘From’ and ‘Data Object’ for Process and make ‘Public’)

Open the process you designed earlier by selecting it from the ‘Enterprise View’ (1) and pressing the ‘Edit’ button (2)
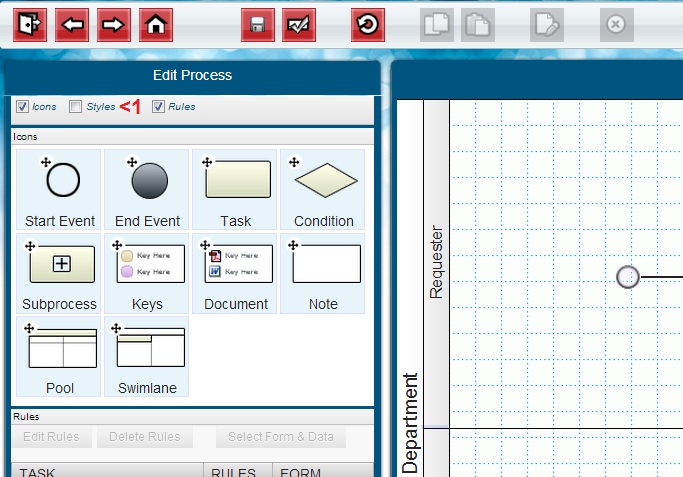
First UN-check ‘Styles’ (1) so that ‘Rule’ pane can properly be viewed.
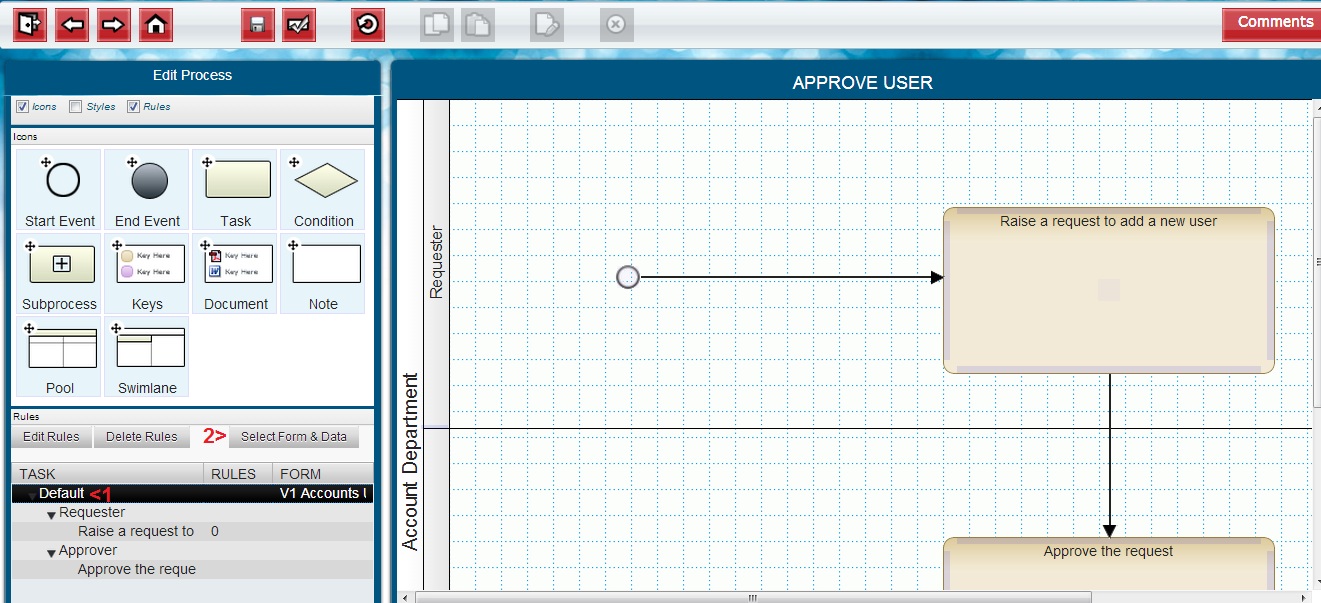
Click on the ‘Default’ row (1) in the table, and press the ‘Select Form & Data’ button (2)
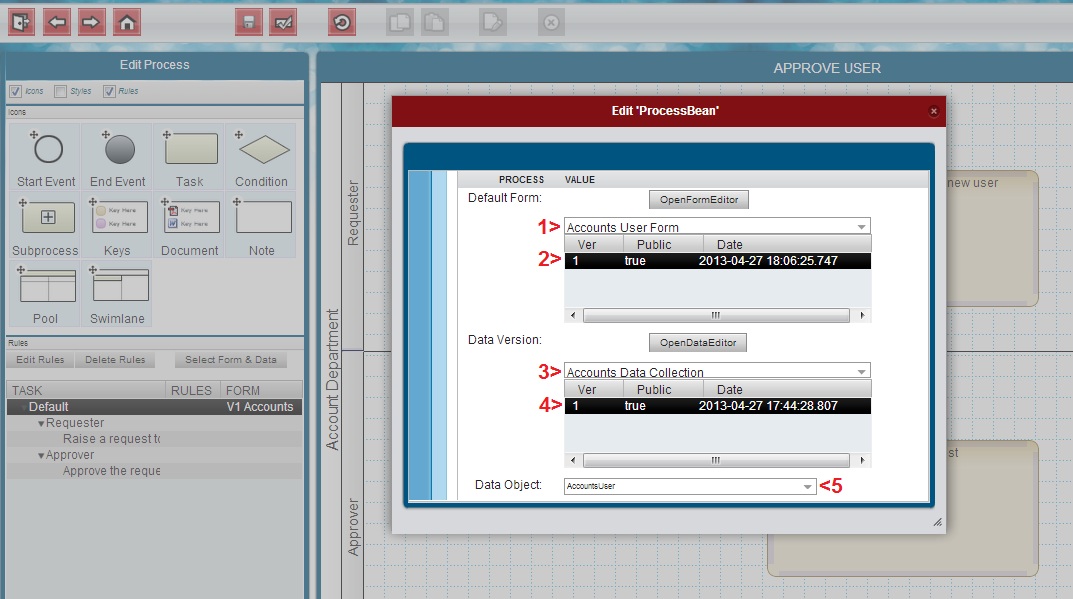
In the dialog box, select the form (1) from the drop-down first, then its version (2) in the table below.
Select the data object collection (3), click on the version of the collection (4) and finally select the data object (Accounts User) (5). Close the window using the top-right close icon.
Save the process from the save button on the toolbar, then use ‘Manage Versions’ to set the process ‘Public.’
Congratulations, your first process is now ready to use. To exercise it, you need to create users, or give yourself access to the roles of the new process. Please see ‘Adding roles to an account‘ on how to do this.


